
I feel like I am doing you a disservice since I have yet to make one of these covers having the car seat in front of me. Yes, that’s right folks, I have remotely made another car seat cover. So the added pressure of making it right the first time when I am totally changing the pattern up had me shacking in my boots the whole time.
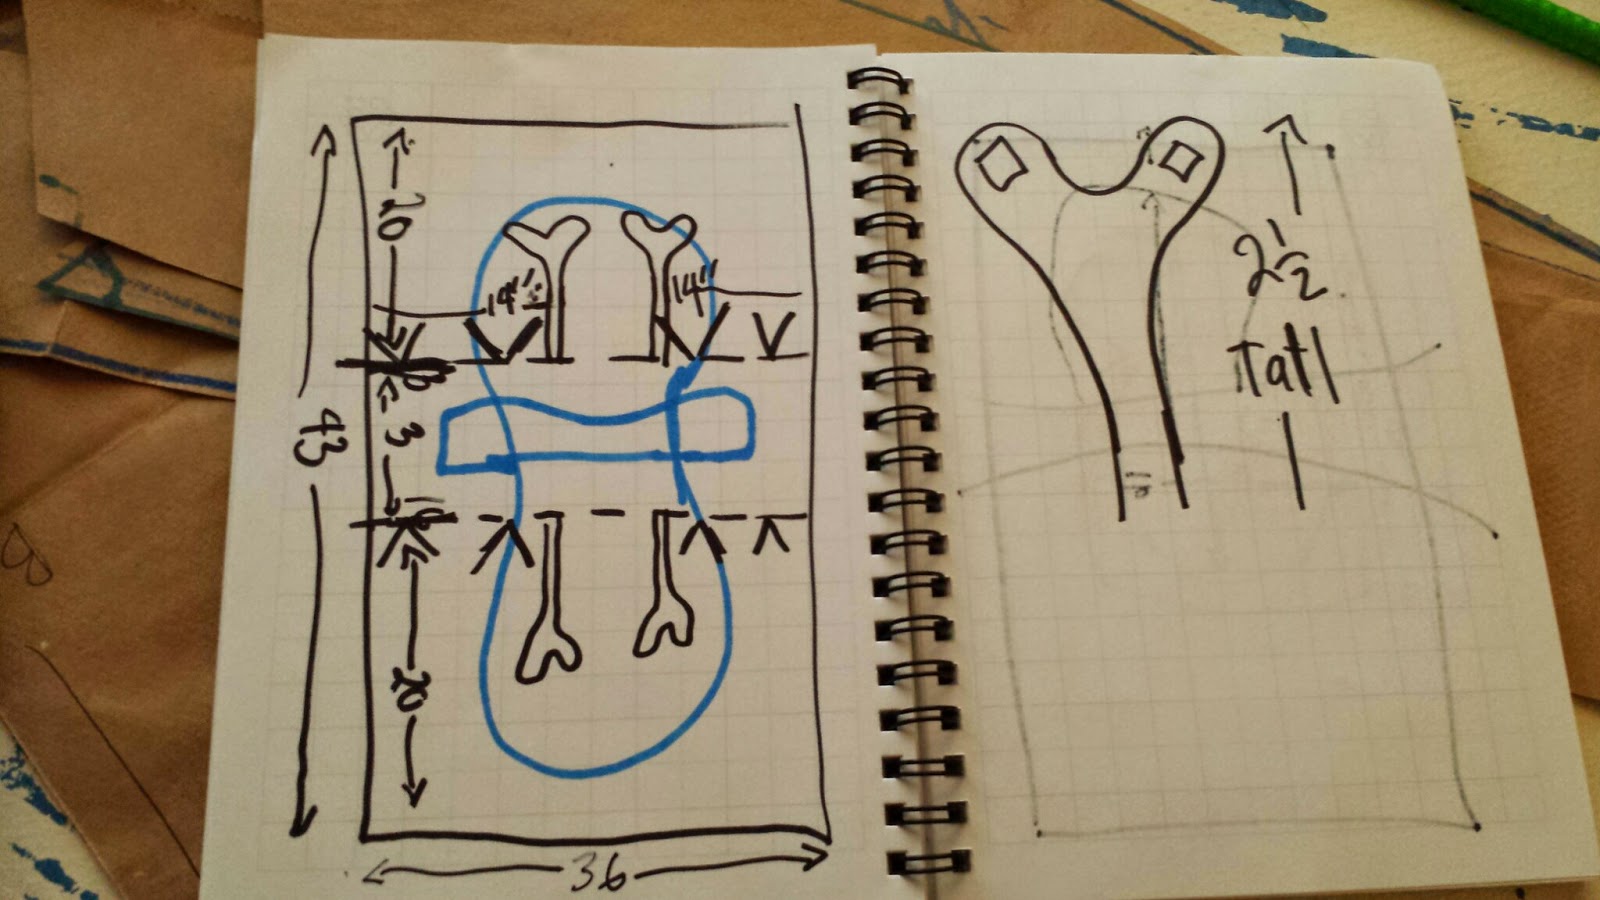 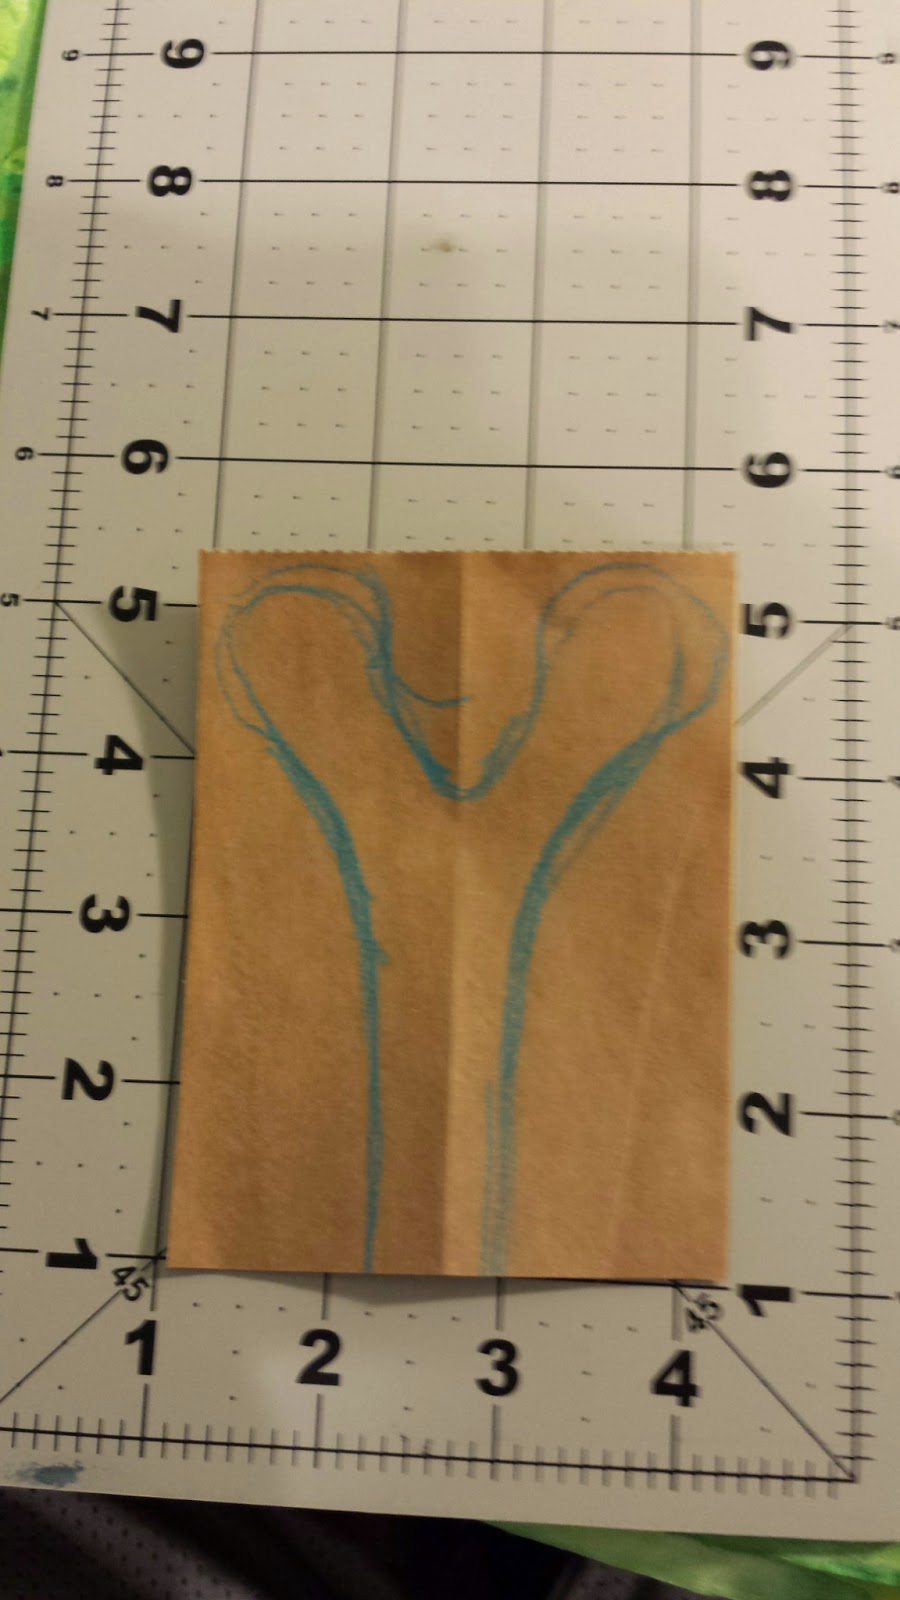 | I made many sketches, this is the one is the one I landed on. On the next page there is a sketch of the straps I wanted to make. Do they look weird to you? I was inspired by a frog's feet & toes. Mother nature is the best engineer right? I wanted to make a strap that had less Velcro on it to prevent it from being too strong. Because I was making it remotely I wanted to be insured that the straps were adaptable. After that I just figured out where things will go and how. Nothing like a little preplanning and strategizing to figure out how to piece it all together. The second picture is to show you the final size of the straps. I made them long so that way after being sewed into the seam it came out to about 3 inches. |
 |
| First I folded the fabric in half, cut it down to size (a little bigger of course), then cut a 3 inch strip down the middle. I made my strip down the center however (I imagine) you can move the strip to where you need it relative to handle. Also this method also allows you to use different fabric for the panels or make the ‘front’ bigger than the ‘back’. Customization rocks. Alright so what you see below are 4 sets of straps and 36+ inches of cording cut down into 4 sections (the cording I wanted to make came from My Poppet: Handmade Scrap Fabric Twine. However I tried to figure how to it but I couldn’t, but I wanted to…. Bad! Because it looks so cool so I’m sharing like a good little seamster.) |
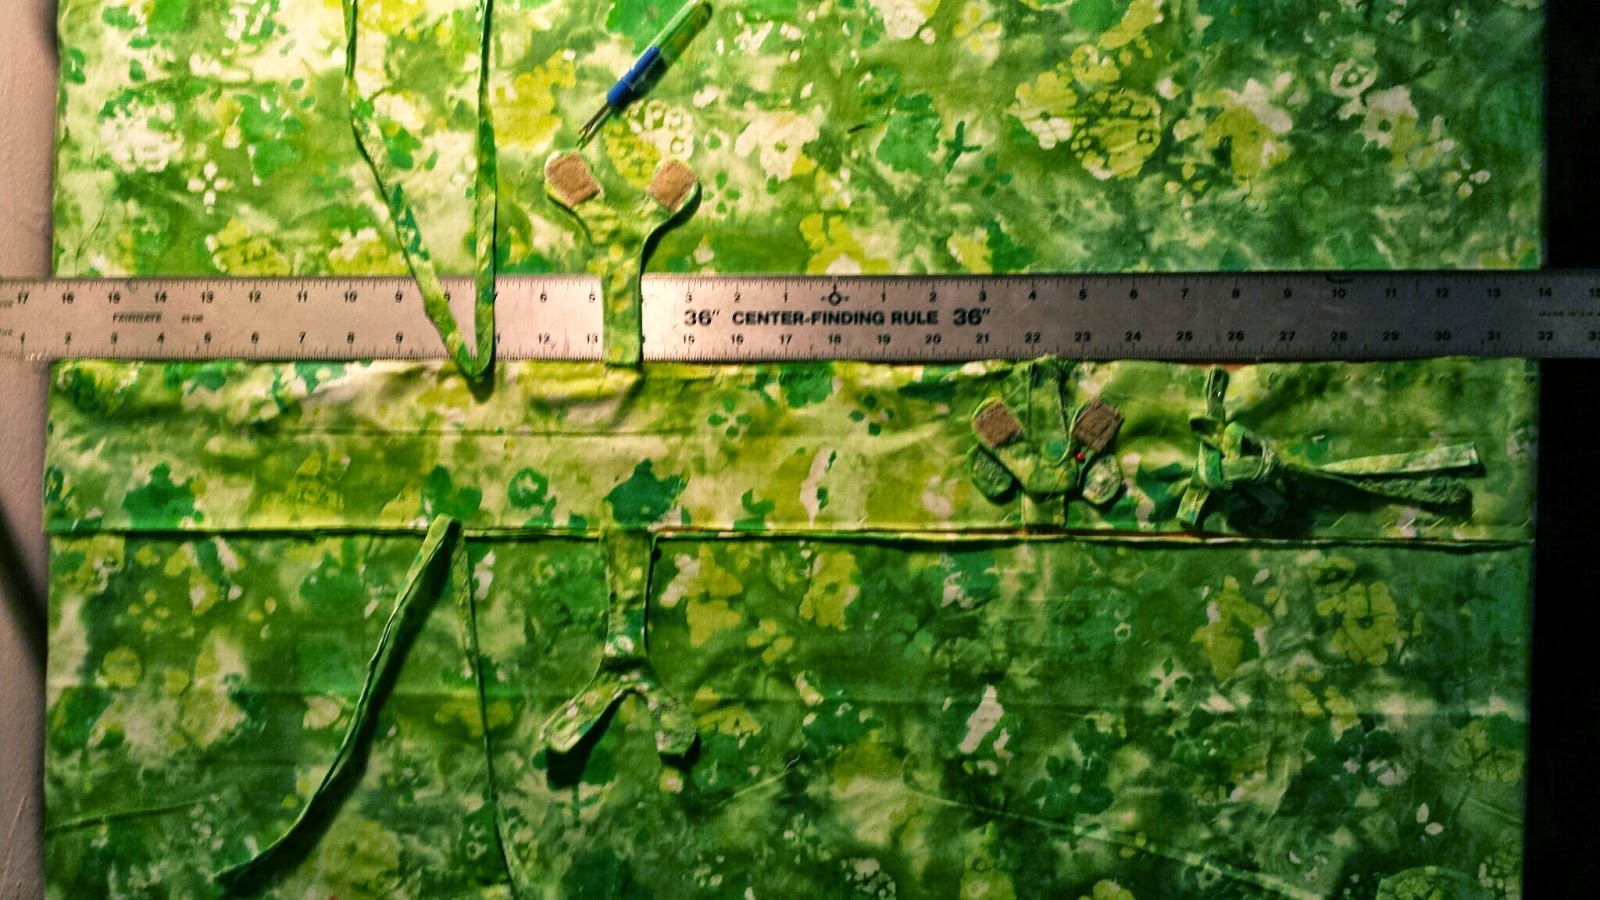 |
| So you can see on my ruler that I placed the straps 8 inches apart and the cording another 3.5 inches from that. On the right you can see how I CAREFULLY folded and pinned the cord and the straps to the center strap. I didn’t want to sew them into the seams of the center straps when I sewed them RST. So once I got it all pinned down I sewed the center strips and the two side planels RST. |
 |
| Here is what that looks like. Two more seams to sew and you’re all done. Take this center strap and sew it (once again) RST with the two panels. Yay! I can’t believe how great it turned out. That's not the car seat the cover is going to, but I tested it when I was near by one. Because of the straps, the way I made them and placed them, it should be great... hopefully! |
  I learned a little something on this project, and here what I learned this time:
|
No comments:
Post a Comment