Wednesday, April 8, 2015

Fancy in Floral: The Car Seat Canopy fit for a Pretty Princess


I am a lucky man. I may not make new friends easily, but the friends I do have been my friends for centuries now. One of the numerous benefits of these long term friendships is that I get know their styles pretty well. This particular car seat canopy is for my super girly friend. She’s the type of girl who we all have to wait a minimum of hour before we can go out. She’s my sparkle princess of dance. So I ask you, how could I not make a SUPER girly car seat canopy for her first baby girl?!


She’s into the whole new owl trend (me too btw). I found these three prints in the discount/remnant section of Joann’s Fabric Store. That section is my finical downfall – I can’t even remember the last time I bought fabric off the bolt. I decided to use the flower print (because her car seat is pink and grey) and save the owls for a diaper bag. 


I knew for sure that this time I wanted the front flap to have an opening.  I googled around and found this awesome freaking tutorial: CARSEAT CANOPY by Genevieve.  She did a real nice job on hers.  Like her sewing skills are for real.  Anyways I just reviewed her work I didn't really follow it or anything.  One thing I did like is her binding-ish stuff around the opening. I rummaged through my scraps and found that pink and green print in the jelly-roll-left-over-container. Even though it isn't an exact match, it’s like the weird relative who stands out in the family photo but is the connecting thread amongst you’ll.


True to my unorthodox, dissenter self, I of course decided to do something new this time… maybe to my detriment however. I tried to upgrade the canopy pattern I have created over time. If you reader you might have seen my other iterations and evolution of this whole design. This time I created an opening in the front, something that was requested from both previous recipients. I went willing into the breech, what problems could this present for a noob like me…?

I guess the first error is a folding shortcut gone wrong. I am really not a super fan of measuring so I prefer to use the origami method of measuring and cutting fabric. So here was the logic I followed. Find the total length, divide in half, at the half way point measure ½ the total length of middle insert and cut. Somehow, mysteriously, miraculously something got a little cray cray on the cutting portion of this project. Here’s the stitch, I didn’t notice that I messed up the cutting until everything was done. 

Le Sigh… IF ONLY I reexamined this photo before continuing on maybe I would have gotten clued in. There’s another tally in the column for doing things in a more practical manner. Whatever


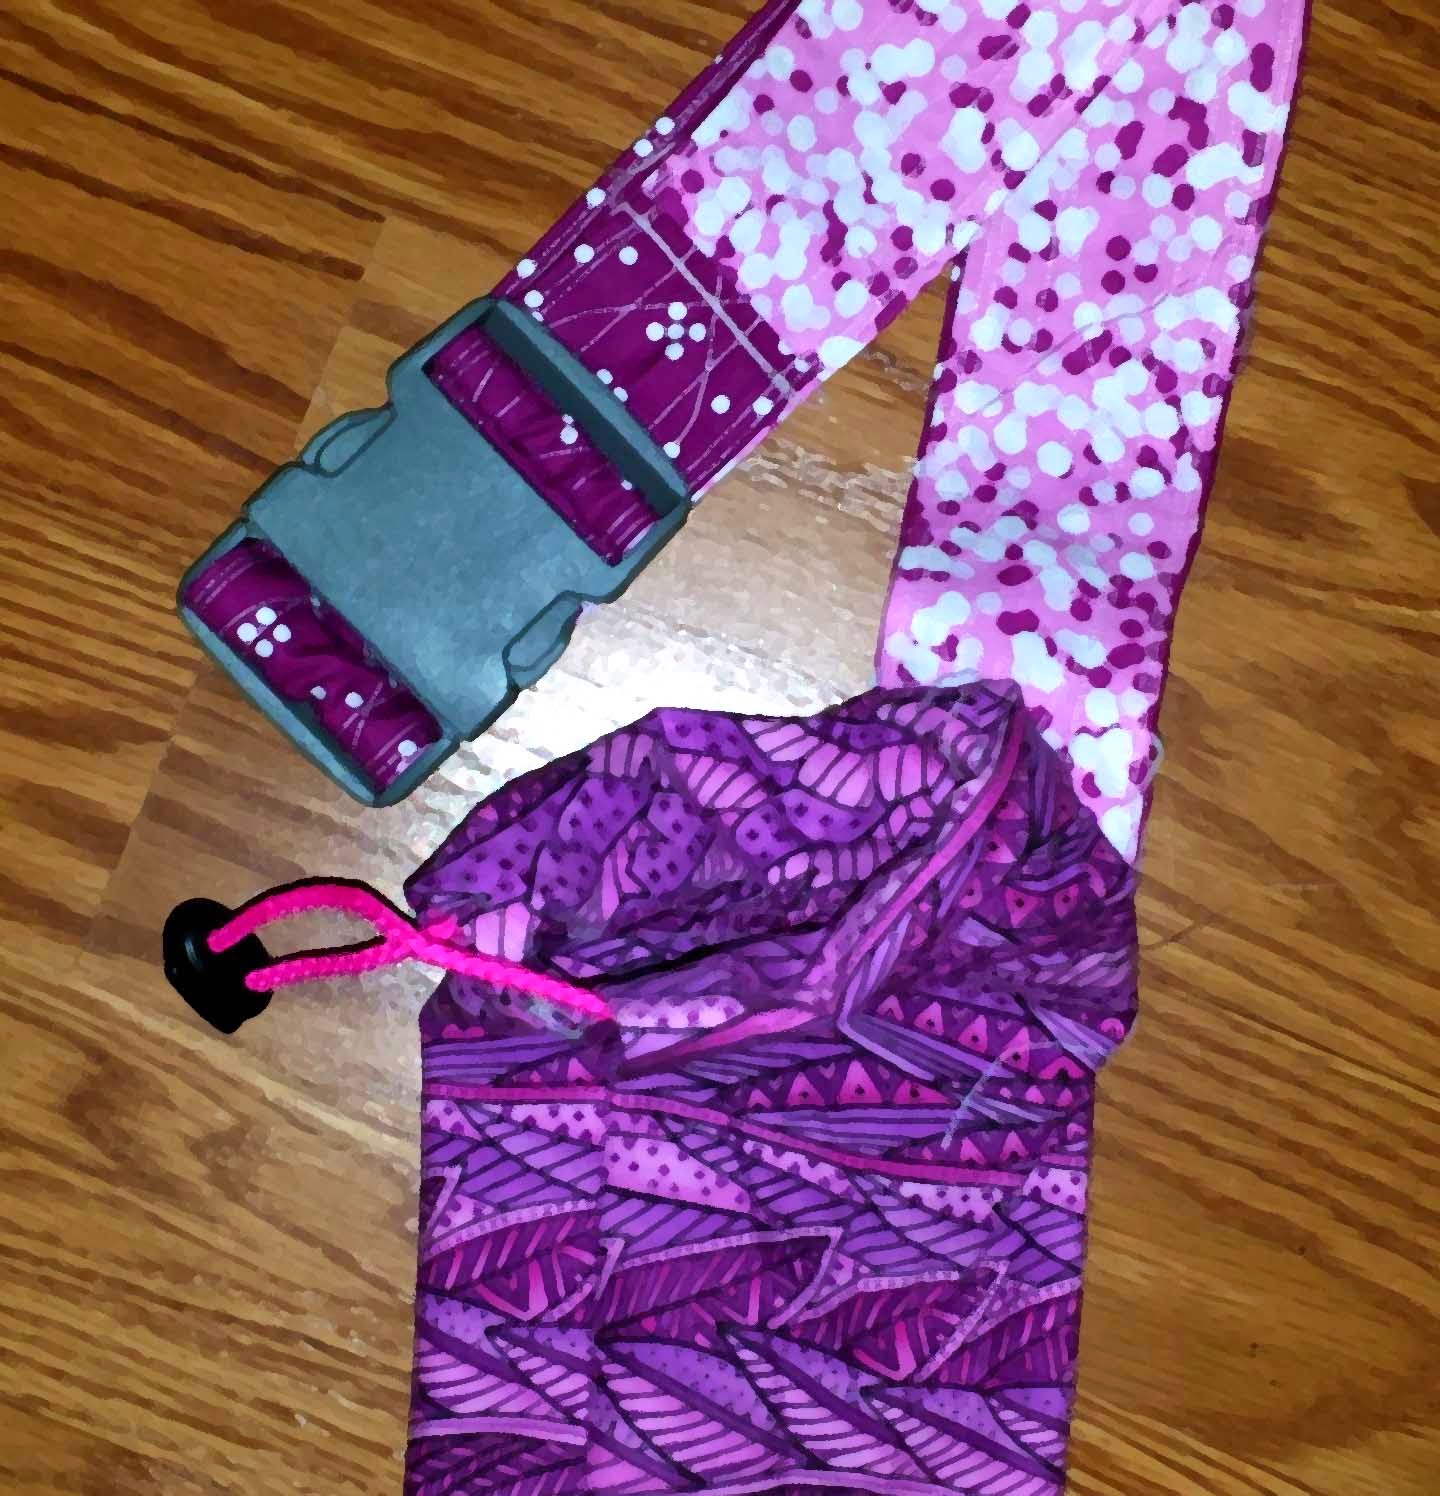
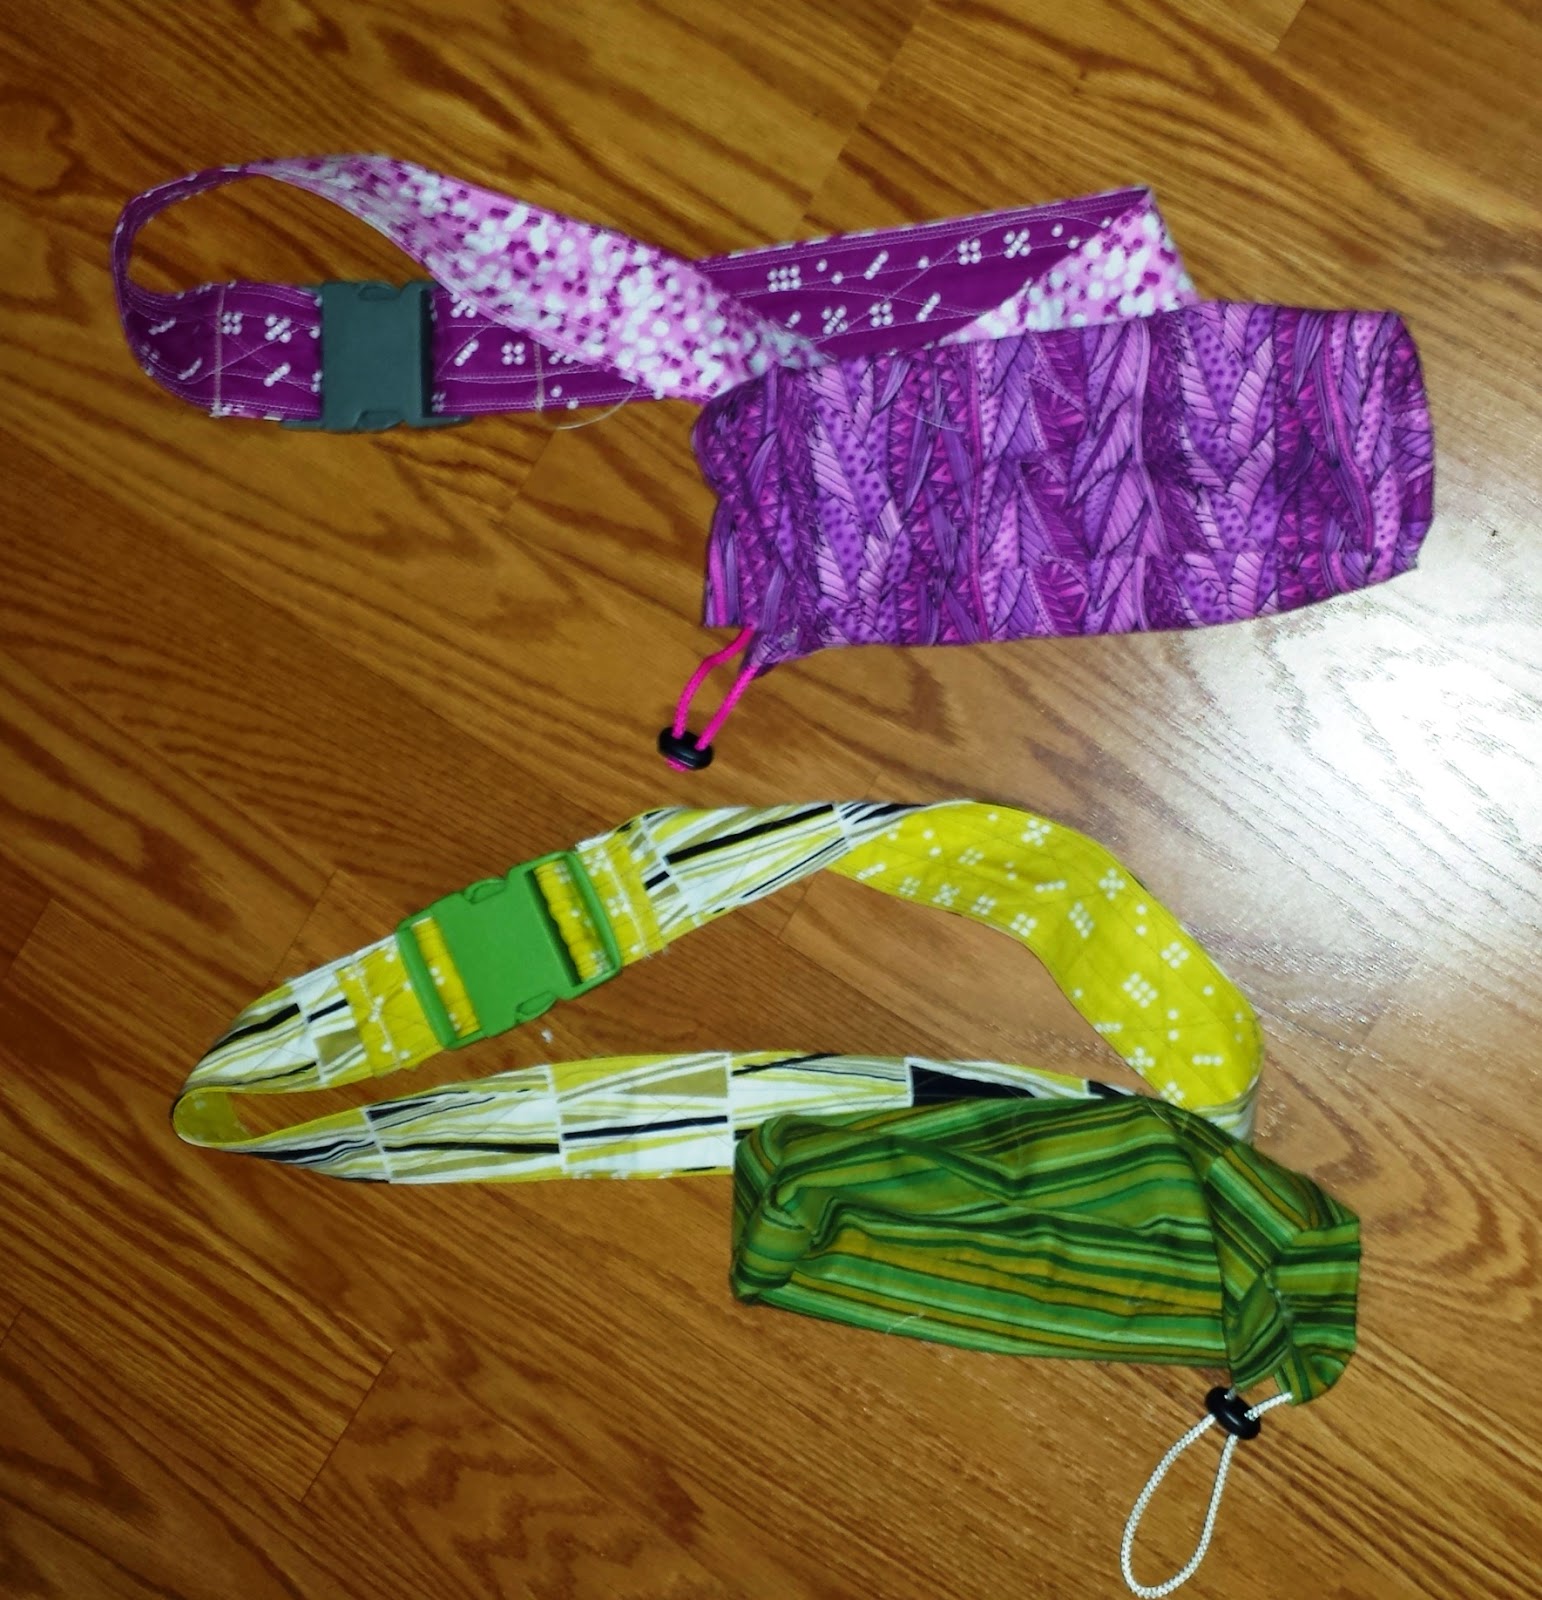
Anyways everything turned out okay in the end. I did a very pretty job on my straps. I even did a fancy top stitch on them. woot
And I had fun creating the straps from scraps. I used variegated thread (that’s multi-colored for those not in the know) and a simple zig-zag stitch.
EEEEEEEEEE
 I love it! Its all SO CUTE!


Like I said, everything turned out okay, luckily. I realized by the time I was ready to put all the pieces together that things were wonky. I just hoped for the best at that point and soldiered on. I think if there was a lesson to learn this time is that I thought to make the middle insert wider. I think I was misguided in that misgiving. The middle should be thinner, not wider, if there should be one at all. There was another tragedy on this pretty princess sparkle tour - my recent fascination with batting. I used it in the straps and loved the feel and the look and the weight. I ATTEMPTED to use it for the binding around the opening. I ripped it out because of a last minute, late night decision that it added too much weight for the front flaps. I’m not going to get into what a life changing experience it was too rip the stitches out of batting and a fragile piece of fabric.


I stopped at this point to test it on the car seat. Like I said I knew by this time that I cut the front panel too short so I needed to know if panels had to be added in the front. Plus like, what if the straps were too short or something?

I ran it over there and JUST BARLEY did the front section cover the car seat (Only when the handle was all the way up). So now all that was left was add the closures, velcro the straps, and top stitch. Should be easy no? NO!


Putting the snaps on (the very very pretty snaps) took about 2 or 3 hours and about 20 to 30 years off my life. It was horrible, I think I even broke down and cried, internally at least, at one point in time. Probably when the tool broke… which might have happened while I strangling the life out of it. I think I need to get one of those pillars looking things that put the snaps on.


I don’t know why it was so hard this time, maybe because there was no batting inside of the binding. I put on snaps once before and even though the first couple of times were a little hard, it was nothing like this. I think I bought like a pack of twelve, the canopy used 4, I think I have like 2 left. Big thanks to Kelly over at the Indiana Inker who wrote an amazing illustrated blog post on how to use these Dritz Easy Attacher Snap Fastener.  And after reading her tutorial it got better and finally got a few on there.


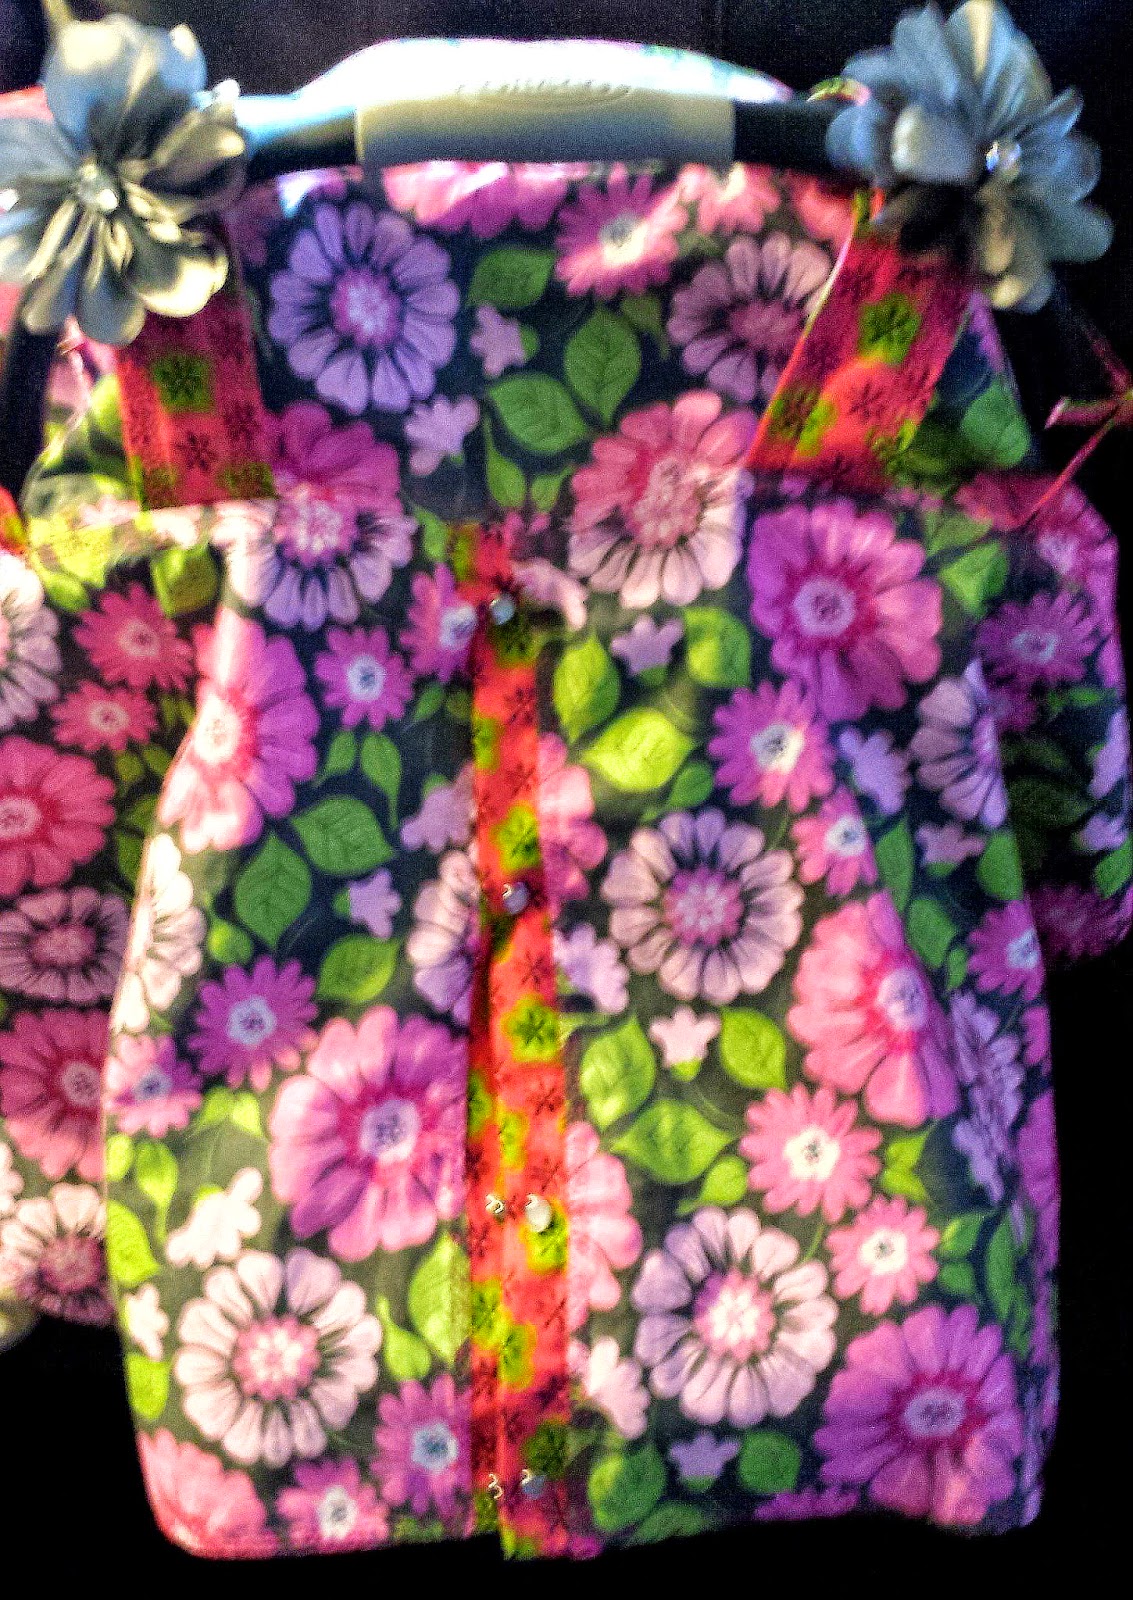
These pretty embellishments were pretty much a given. They weren't easy to sew on with the machine, but somehow I got it work. I wish the maker had a like some instructions or something. The base was very tiny.

I top stitched the whole thing with this little tulip pattern. Isn't it very adorable?!? I love it and they have functionality as well.


Sorry my final pics are so blurry.  Might have been the 8 cups of coffee that I had that day....


The lesson I learned this time came easier than making this pink explosion:

  • Mostly I think if I have to make another one I am just going buy the pattern I found while researching how to make this variation I found at Craftsy by Elizabeth Wyatt. Now that I have gotten some zipper time logged at the sewing machine, I think they are cool. I've never used a pattern before, I wonder what that would be like.
  • Also I am considering downgrading from sewing to gluing rocks together in the park as a new crafting outlet.


Tuesday, March 24, 2015

The on the GO-GO-GO Diaper Bag


My sewing schedule completely revolves around the needs of my friends and their sewing needs revolve around their babies. I wish I found this cool tutorial a year ago when I started because it rates off the chart when it comes to simplicity and function. If you and your younglings are going on a quick trip, why pack a diaper bag when you can grab this one stop wonder.

Before I get started let me give some praise to the maverick seamstress over at the Noodlehead. What an amazing website. I have found that they are an excellent resource for sewing noobs, so if you’re like me check them out.

Obvs, I found this free pattern on their page and my heart just pitter-pattered its way to functionally heaven. Sometimes I’ll rudely say to my mom friends, “gosh, why don’t you have an emergency diaper bag in the car…?” Of course, who has the time with a newborn glued your hip to think of packing and storing an emergency diaper bag in the car? Well, now they can have solution to not only those times but also times when they just need a couple of diapers (and supplemental supplies) for a quick trip around the corner. I mean for realsies, what better gift could you make for a new mama and dada? They are sooo easy to make and can accompany an additional gift perfectly like a baby quilt!


I made my first one for a co-worker. Now, typically I won’t spend my time and money making things for randoms – especially this dude. This little shady so and so never says hello or even gives me a passing smile. The only time I've talked to him he dresses me down for not wearing a helmet on my bike. Do like look like an 8 year old? NO! Don’t even tell me what to do homie. Anyways, I like to give people the benefit of the doubt and find a way to bridge the divides. Plus, I thought a baby gift might cure his RBF. Besides I’m still on this make-a-tester-before-the-final-product kick so I had to give someone the preliminary product.


This tutorial is sooo freaking easy, I can’t even do a demo. I mean I spent more time picking out scrap fabric and cutting it then I did sewing it together. I mean OF COURSE I mavericked the seamster out and did some independent thinking. Here are is what I pulled from my scraps to start with. A couple of leftovers from a previously made tote bag, including the remnants of the straps – which became the quilted (appropriate term? Or is that considered piecing? I can never tell) strip.


Once I completed the first one, I did ramp it up for the final product. I added an internal pocket for the hand sanitizer (for those extra messy poops) and did a little quilting thing.


I mean what more can I say about this – IT’S THE PERFECT NEWBORN GIFT! I was able to load one of these up with three dishcloths, a bottle of diaper cream, a mini hand sanitizer, and thing of wipes. I would buy diapers, but…. I guess I can just say it being a dude an all – I don’t know jack about diapers. Don’t get me wrong, I've change a diaper plenty of times, however I have never purchased a pack of diapers in my life (thank the goddess). I even tried having my mommy friends explain to me what kinds of diapers I should buy…. but…. every time I went to the diaper aisle my brain short circuited. So I just figured they could throw their own diapers in there.


Now, of course this maverick seamester has thought of a new way to make this on-the-go diaper pouch, but I haven’t had time to implement my concept. 

Lastly, I wish I could post more. I am trying to get my non-maverick-seamster life in order, which has unfortunately taken a majority of my free time. But have no fear, I am still sewing, just not publishing as much as like. How much more maverick can you get than mystery sewing?


  • Keep searching the web for projects. I just love this project, I mean come on! You don’t even have to have a design or motif to make a new mommy one of these. For reals, you barely have to have entry level sewing skills to make one of these.
  • I’m not going to get into it on this post, but I have discovered the unlocked potential in piecing. Let’s just say I've been attempting to mentally picture how to make chevrons. You’ll find out more later.
  • This is more for you "followers of all the instructions" - just break them. I messed up cutting this project both times. However each time they turned out great. Now I am only venting this because my mama is such a perfectionist. The other day I went over to her house and JOKINGLY pointed out a couple of misaligned patches in her DONATION QUIT and holy HIJOLE! I've never seen someone break out a seam ripper that fast. Please mi amigos y amigas, just love what you do and forget the rest. When I sewed the first one, I accidentally put the vertical strip at the bottom instead of the top of the center strip. Did I yank everything out? NO! Sometimes you just need to learn to live with the unexpected.
  • I always like throw in a few of those rings with every baby gift.


Thursday, January 29, 2015

Make Your Own Water Bottle Sling!


Hey my sewing buddies. I took a little break from sewing because I knew there was no way I could get my machine during the holiday madness. I was right and a little wrong because I was able to complete a sewing project but I had to do it on the fly! I made two Water Bottle Carriers/Slings/Holders for my niece and nephew.


I know I sound like the grinch but I’m not super fan of Christmas. One of the things I don’t like about it is gift giving! Don’t get me wrong I love giving gifts (and receiving them), I just prefer to do it organically rather than being forced to by cultural norms. But my rebellious logic melts away when it deals with kids….. and I will, of course, get them Christmas gifts.  But if you are over the age of 12, sorry for yea.


My niece and nephew were in town during the holidays and I know this sounds weird but originally I wasn't going to get them anything while they were here but ONLY because they were doing a lot of traveling so I didn't want to load them down. But I started trying to think of something small, lightweight, and compatible so that they could pack them. BUT I didn't want to just get them some crap gift. They are cool kids who are very active and on the go-go-go. I didn't think there was anything I could make in a day that fit that bill but then…. I remember seeing a water bottle carrier/holder pattern on my pinterest page. It works out great because it can be crammed into their suitcase, I could get access to their current ones for measurements, I could make them essentially the same gift (which I love), and it looked fairly simple to do.


Now please keep in mind that I sewed this literally the day before Christmas, so I don't remember everything about it. The only reason I'm sharing this project is because the tutorial I found was great, the project is pretty cool overall and I think it's a great gift for kids. Originally I thought of buying them cool new water bottles and then making the customized water bottle carriers to go with them (I also thought of making them super hero costumes, but talked myself out of that)…. But I saw their water bottles lying around the house so I just snuck in a couple of quick measurements when no one was looking.


My source for information about this sewing project came from Melly Sews and even though I didn't follow her pattern or instructions (lol - sorry I never do, do I?) I liked her blog post: it was easy to read and gave me confidence to do it on my own! I chose to do mine differently than hers for a couple of random reasons and you’ll see why later. Anyways I was inspired by some fat quarters I got at that sewing convention I went to last year and some jelly rolls that my mom gave me. With those two things I can make practically anything!!!!!!!


I am still learning for my lessons and this time I did a test run before making the final one. The main reason that I chose to do a test first is because I was doing it so differently than the instructions on the tutorial. I think one of the reasons I deviated from the tutorial was because I wanted them to make the closure at the top differently. Instead of being open I wanted to create an opening that can be closed with a drawstring. I think just playing with a fat quarter made me realize that I can make one complete water bottle holder from the fact quarter (folded in half) and the excess fabric could be cut in half (approximately) and used for the bottom and the closure at the opening.


I don't remember the water bottle measurements but I'm guessing they were about 5 inches in diameter. So my thought was to cut it slightly larger and I would just stitch it up and turn it around. I am NOT doing very good job of describing this am I?

You can kinda see what I mean here the rectangle on the left is the water bottle holder, and the two pieces on the right would become the closure at the top and the circle piece for the bottom of the holder. I love the way I did it. It was much easier and they were essentially lined in the end - which rules.


Well you can see here that they turned out pretty good. The cord stops were left over from my gym bag drawstring project. Ahh I miss that gym bag. And the clip releases I picked up at Handcock’s on my way to the house to give them their gifts. I literally had to slip into my mom's sewing room to sew it all together!


Anyways I think there was other stuff I wanted to talk about…..


  • Pining and sewing a circle piece into place was interesting.  I don't know if I have done that before, it was a little tricky. I want to see if there are other instruction on how to do that.
  • Oh I know what I want to talk about is some of the things I would do differently. I wouldn't change the holder at all (I think my top closure piece is so cool) but the strap situation I would definitely change. I love the clip but what I don't like is how the strap attaches to the holder. In the tutorial the step for attaching the strap to the holder is very similar to a tote bag sort of construction. I didn't do it that way.  I just stitched the strap straight onto the holder across from the clip. But what I think I would do next time is I would cut/stitch two large button hole type openings that fit the width of the strap and thread the straps through them!!! RIGHT? Can you picture it?!?  This would allow the holder to move around the strap. If I was to do it that way I'd also would put a couple of snaps on the holder and the strap so that way if the water bottle holder was against their back it would lay flat against the strap when snapped down! Can you picture it!!!??! Makes me so excited to try again! I guess I will have to make all these variations and take better pictures so I can show you guys what I'm talking about.
  • What is really surprising about this project was how much it allowed me to be creative. I have a gazillion new ideas for this project and I think it could be very interesting and cool to make them as gifts.  Gifts for people and kids who like to hike.  Like me!   

Thanks for reading you silly seamster readers.  :)


Wednesday, December 10, 2014

Free Motion Quilting: A Beginners Perspective


Well, I have finally done it. I've finally spent some time becoming familiar with free motion quilting. You know I have been dying to do this for like a year now. Now that I have logged some time at the machine, honing in on this skill, I have some mixed feelings. I learned so much doing it and still appreciate the art of it all… but… oi I'm just not sure it's for me.

I decided to get some more practice doing my free style quilting on making another fabric bowl. I just love them…what can I say?!? They're so freaking cute and fun to make. Plus, I'm not going to make a quilt just to practice free motion quilting on. I mean, come on, right? Like I have time to make a quilt right now. If you got a different project to try it out on, let me know gurl.


Remember this fabric? That's right; I used it for a purse a while back. It's like a light corduroy and I still haven't picked up any heavy weight interfacing so I needed something with a little stiffness. I'm not sure it was the best fabric choice to make my free motion quilting debut on since it's so busy. It was also confusing picking a thread color for it. I did try using a multi-color thread that I was hoping was going to look the best, but it turned out white just looked the best.
I traced the pattern off my computer screen on this notebook paper at 70%. If you're a good little seamster you can figure out the size from this or you can trace your own pattern or better yet, print it out. Anyways I only had a 19” x 28” piece of this fabric (hence the math on my pattern) so I shrunk down the original pattern so I could get enough pieces (12 petal pieces and 2 center/base pieces). I decided not to do different fabrics for the exterior and interior of the bowl.
LOOKIE What I Remembered To Do This Time! I remembered to iron the fusible interface on first BEFORE cutting. Who says this sexy dog can't learn new tricks? I'm just happy that I am learning from my mistakes.
This picture is classic maverick seamster - I cut all 12 petals (sides of bowl) pieces at once using an elaborate folding technique. Oh dear… when will I ever learn???

Hehe… never…
I really liked how last time I made them a littler larger and cut them down. It's really makes the world of a difference when you go to put them together to have a clean edge - makes it easier to bind them. So after cutting everything out I worked on what type of pattern I was going to free motion quilt.


I call the one on the right the sea shell and the one on the left the flower. I totally wish I did the flower pattern now, but it is pretty difficult and I just didn't feel confident enough to do it on the first time. But now that I have completed the project, I think I could have done it.

Now comes the part of this blog where I start to share what I learned free motion quilting. It's crucial to know how to set your sewing machine up before even trying this (obvious you'd think....). Not completely understanding how to get my machine set up properly prevented me doing this technique for a very long time. For my machine you gotta change the needle, lower the feetdogs, change the presser foot AND (here is the thing that f**ked up my sh*t) is that you have to move the presser foot lifter into a hover/mid-level position.


Man it is the hardest thing for me. I don't know if you have to do it on your machine but it is weird to me. I have got such strong muscle memory when it comes to lifting the presser foot up and down when sewing that it was hard for me not to do it. The other thing is that if you have to stop you can't easily pull out the thread if the presser foot wasn't up all the way. So here is what happen, I would have to stop quilting for some reason and I'd lift the presser foot up from the hoover position and then forget to make sure it was back in hoover position when I started sewing again.... and here's what happens when you accidentally forget to put the presser foot into the proper place……… I did this more often then I would like to admit.


That was frustration number one. Number two was my thread. I bought some sh*ty quality thread and it was not good. It just caused more problems than it was worth. I mean for a dollar more you can get some good quality thread. I have never had these problems on other spools I bought in the past. Only when I use this crappy, inexpensive thread. It was one of the first things my mom told me when I started sewing, “buy good thread, you'll never regret it”. Boy, was she right (do not tell her I said it or that I used crappy thread in my machine).  ANYWAYS... the pictures above illustrate this frustration.

Here it is all trimmed down and quilted (Don't ask about the center piece stitching – let's just say I should required to have a permit to even use a rotary cutter). I like it, obviously the quilting portion of this project requires more practice…. This is definitely novice work at best. The original pattern and tutorial I saw at Gret's Quilting Studio, she appliqued a cool design on each one and then free motion quilted around it (I think). Which I think is such a great idea. Yea..... I got A LOT more practicing to do.


Okay, I will tell you more about some things I learned about free motion quilting at the end, but let's finish up the project while I still got your attention. There's one thing I want to talk about. I deviated (shocked? you shouldn't be) from the way from the instructions and how I did it last time. What I did might make the difference when you go to sew your own fabric bowl together......


The instructions are to zigzag stitch each of the petals together along their sides BUT what I did this time instead (maybe by accident or maybe not – you'll never know) was to stitch the sides together by folding or stacking them on top of each other. I can't really explain this so I hope you can get what I am saying from this picture…. The seam on the left is stitched across the two pieces and the seam on the right the two pieces are stitched stacked on top of each other and sewn from the top. You can see that the downside of this way is that the bowl loses its reversibility and there are no visible seams on the inside. But the reason why I choose to do it this way on all of the sides is because it makes the petal pieces stand up tighter. This may be a solution for the lack of strong interfacing. I wish I could show it better… but it is something you gotta try for yourself.


I love it even though it reeks of rookie. The bottom needs to be weighted because it is a little tipsy (A very wise, learned seamstress taught me about doing this). I like it despite its many flaws – now that's deep.


Okie dokie here is everything else I learned about free motion quilting when doing this project. Hold on to your granny panties, this is gonna be a long one:

  • Crappy Thread = Never Again. Not only is it a source for headaches but why would you want to do that to your pretty pretty sewing machine?
  • Speed is King. Moving at slower speeds I think is harder; the sweet spot is a controlled quick speed.
  • Something was going on with my needle when I was doing free motion quilting. It was like making a clicking or like a ting-ing noise. I think if you look close at the pictures… its looks like the bottom stitch got pulled up through the fabric…. That may not make sense, but was that the problem that cause that sound? I'm not sure I know enough about sewing machines but it sounds like the needle isn't properly engaging with the bobbin. Now that sound only happened when I was free motion quilting, every other time is fine. I changed the setting on the machine to make the stitch tighter, closer together. I'm not sure if that is what I was supposed to do or not, but it felt right when I was doing it. I don't know, maybe I need to take a class.
  • I get what eyelashing is now, but not sure how to prevent it. Any suggestions?
  • This sounds a little random but the posture you have while sewing is so important. The first few pieces I was like hunched over and so I tried it just sitting back and relaxing and the experience was much much better.
  • I am still not sure how I should be rotating the fabric under the needle. I tried a couple different ways but never really got which way produced better results. Sometimes I just freed my mind from over thinking and just did it and that sometimes produced nicer work. But this can't just be a luck or a intuition based technique. There must methods. There must be!!!
  • Uhhhmm…. I think that's all for now…. But PLEASE if you're still reading and got deep and powerful skills of free motion quilting then, please, Direct me o wise one. Because as of right now I like it, but I think I like geometric patterns of quilting better AND they can be done without the hassle and heartache.


Thursday, December 4, 2014

Storage Organizer Bin Container Thingie


I’m not sure what inspired this project. I completed this project like two weeks ago and I’m too old to remember that far back. I think I was coming off the high of the fabric bowl project and wanted to keep rolling with the storage container idea. I definitely need them. Lately the sewing room has been a wreck. Which I am fine with, I like chaos – it is an inevitable variable in this life, might as well learn how to embrace it.


I found this tutorial to make a Fabric Organizer Bin on my Pinterest page. Of course I got a mad ton of respect for my fellow bloggers however I didn't love this tutorial. I don't know why but for some reason I found it hard to read and the pictures were like very confusing. I love a free pattern, but you gotta put the measurements on it – so there’s the first frustration. But its free and that’s awesome so hit up Alida Garcia’s Tutorial and Free Pattern Download for a Fabric Organizer Bin aka Diaper Caddy. The plus side of this project, I was able to use my scraps.


So, like I've mentioned I don’t got a printer so I can’t just print out a free pattern. But I was able to ascertain the approximate measurements from the photos on the tutorial.


Look I know it’s easier to just print it up at work and take it home. But I actually am an advocate for doing it yourself. You learn so much.


I like to visualize the construction of a sewing project. By doing several drafts and exploring measurements and such it gives this little seamster much insight.


This was a fun project…. I remember having fun doing it. BUT its just a modified tote bag pattern…. So, been there done that sorta thing. And did it again. Then there was that one time I did it. Anyways the storage bin didn't turn out super great fantastic but I like it. It did inspire me to clean up my sewing room and now I have cool container to store my fabric selections for my next quilting project.


There were more things I did wrong than right on this project, but its cool. You gotta learn somehow. Take it from me you wanna know this:

  • YOU HAVE TO USE HEAVY DUTY STABILIZER. You have to, it’s the only way it’ll stand up. I guess there is the school of thought that it’ll stand up if you fill it up and it’s nice that it collapses down when not in use. I have been thinking of other ways around that…. I got some ideas brewing.
  • I made my straps too long, but I am glad I did and might have been the coolest mistake yet. You can see from the pic above that wrapping the strap around the container bin helped keep it up. Plus I like my stitching on the straps – I’m so talented.
  • Lastly, because I know how to do it now and did my own measuring and pattern making I now know how to make them for custom sizes. That’s right ladies, custom sizes….